Automated Lab Set up
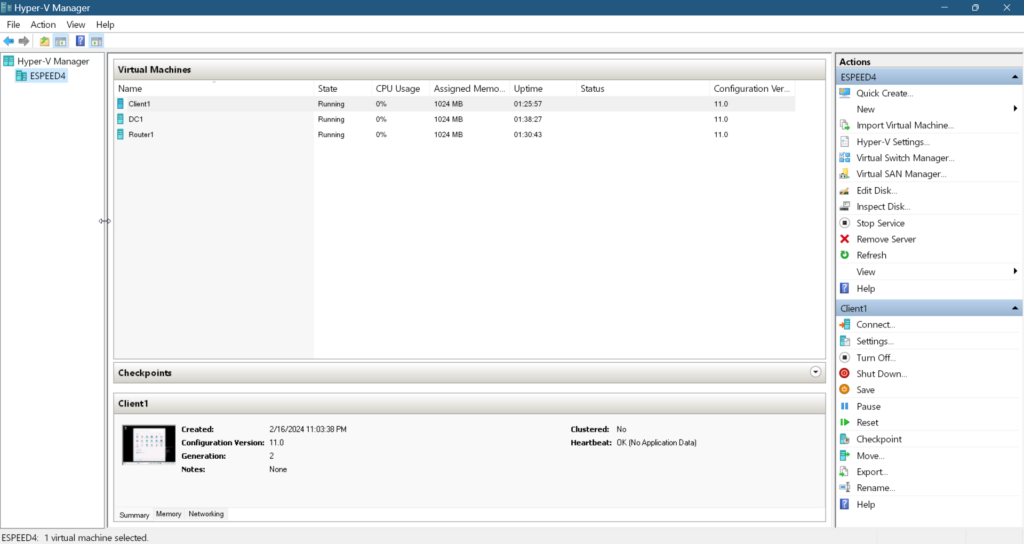
This blog goes through setting up a local VM environment on Windows 11 with Hyper-V using AutomatedLabs. AL makes setting up a real networked VM environment on your laptop without going through the painstaking tasks of doing it yourself. It’s invoked via PowerShell libraries and AL provides many common basic and advanced scenarios, pre-scripted, to set up a configuration on Windows or Linux for testing and development with Hyper-V or Azure. All of this can be installed in a Lab container, in this example, there are three components under “Lab0” which you can rename to anything you want in the PowerShell script (described later).
First, if you don’t have AutomatedLabs installed you can do so with an MSI or via the PowerShell Gallery.
If you already have AL installed, ensure you have the most updated version. As of this blog, the latest version is 5.50.0. You can run this command to update it if you have an older version installed:
Update-Module -Name AutomatedLab
Or install it with this command:
Install-Module -Name AutomatedLab -RequiredVersion 5.50.0
Note that a preview version 5.50.8-preview is available, but I have not used any preview versions.
Because we want IIS on a web server on our VM Host machine, we need to install this PowerShell package “xWebAdministration”
Install-Module -Name xWebAdministration

For my purpose, I wanted to start off with building a single-domain server (contoso.com), but one that connects to the internet with a default switch over a Wi-Fi adapter. It should build a client with Windows 11 Pro (Client1), a web server (DC1) with Windows Server 2022 (with IIS), and because these are on the same domain and want them to allow communication between them over the network, a Routing (Router1) component will be built for the purposes of using Active Directory installation. Each of these even get their own IP addresses!
The first thing to find is the script on the AutomatedLabs site that fits what you are trying to accomplish. What I am doing here will most likely be different than what you might be looking to do. I found my set up from this link on AL for the Single Domain-Joined server. You must understand that this PowerShell script found on this page has some prior versions of windows, which are Windows Server 2019 and Windows 10 Pro. I wanted to use these:
- Windows Server 2022 Datacenter (Desktop Experience)
- Windows 11 Pro
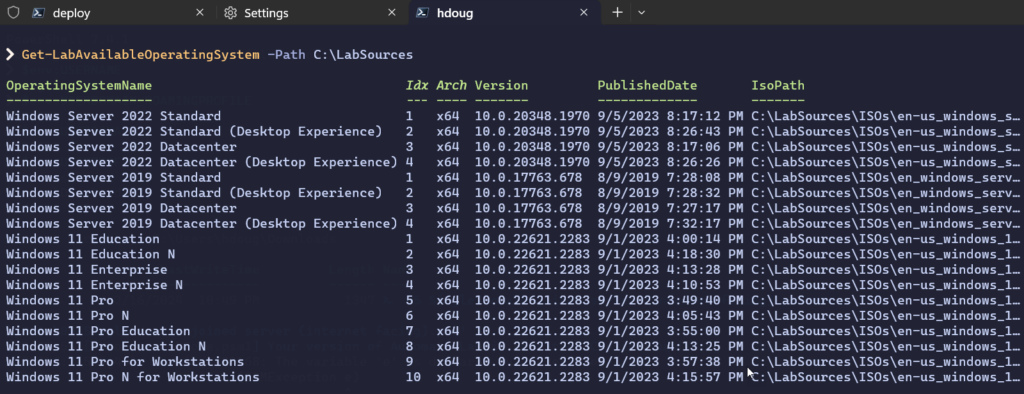
So I had to modify the PowerShell script AND you have to have the appropriate ISO in your \LabSources folder. Again, you can copy the output from the list when running this command, assuming your AutomatedLabs is installed in C:\LabSources, otherwise adjust your -Path based on your installation location:
Get-LabAvailableOperatingSystem -Path C:\LabSources